1.5 KiB
1.5 KiB
1.1.4 Packet Tracer - Create Realistic Structured Cabling in the Physical Workspace and Cabling Devices in a Rack
Objectives
In this activity, you will install a patch panel and a wall mount. You will then use these to connect network devices in the office to the equipment in the wiring closet.
- Part 1: Install a Patch Panel in the Wiring Closet
- Part 2: Attach a Wall Mount in the Office
- Part 3: Connect an Additional Wall Mount and Cables
Required Resources
- Latest Packet Tracer version
Procedure
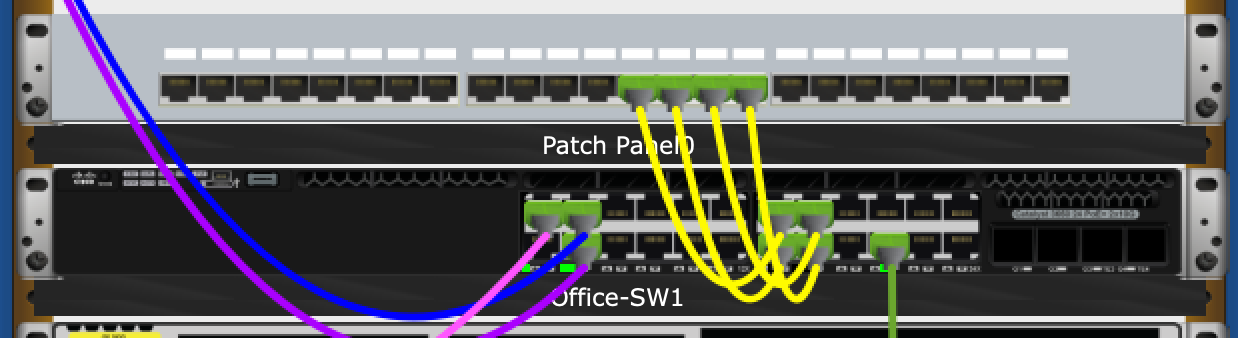
Part 1: Install a Patch Panel in the Wiring Closet
-
Step 1: Install a patch panel in the Rack;
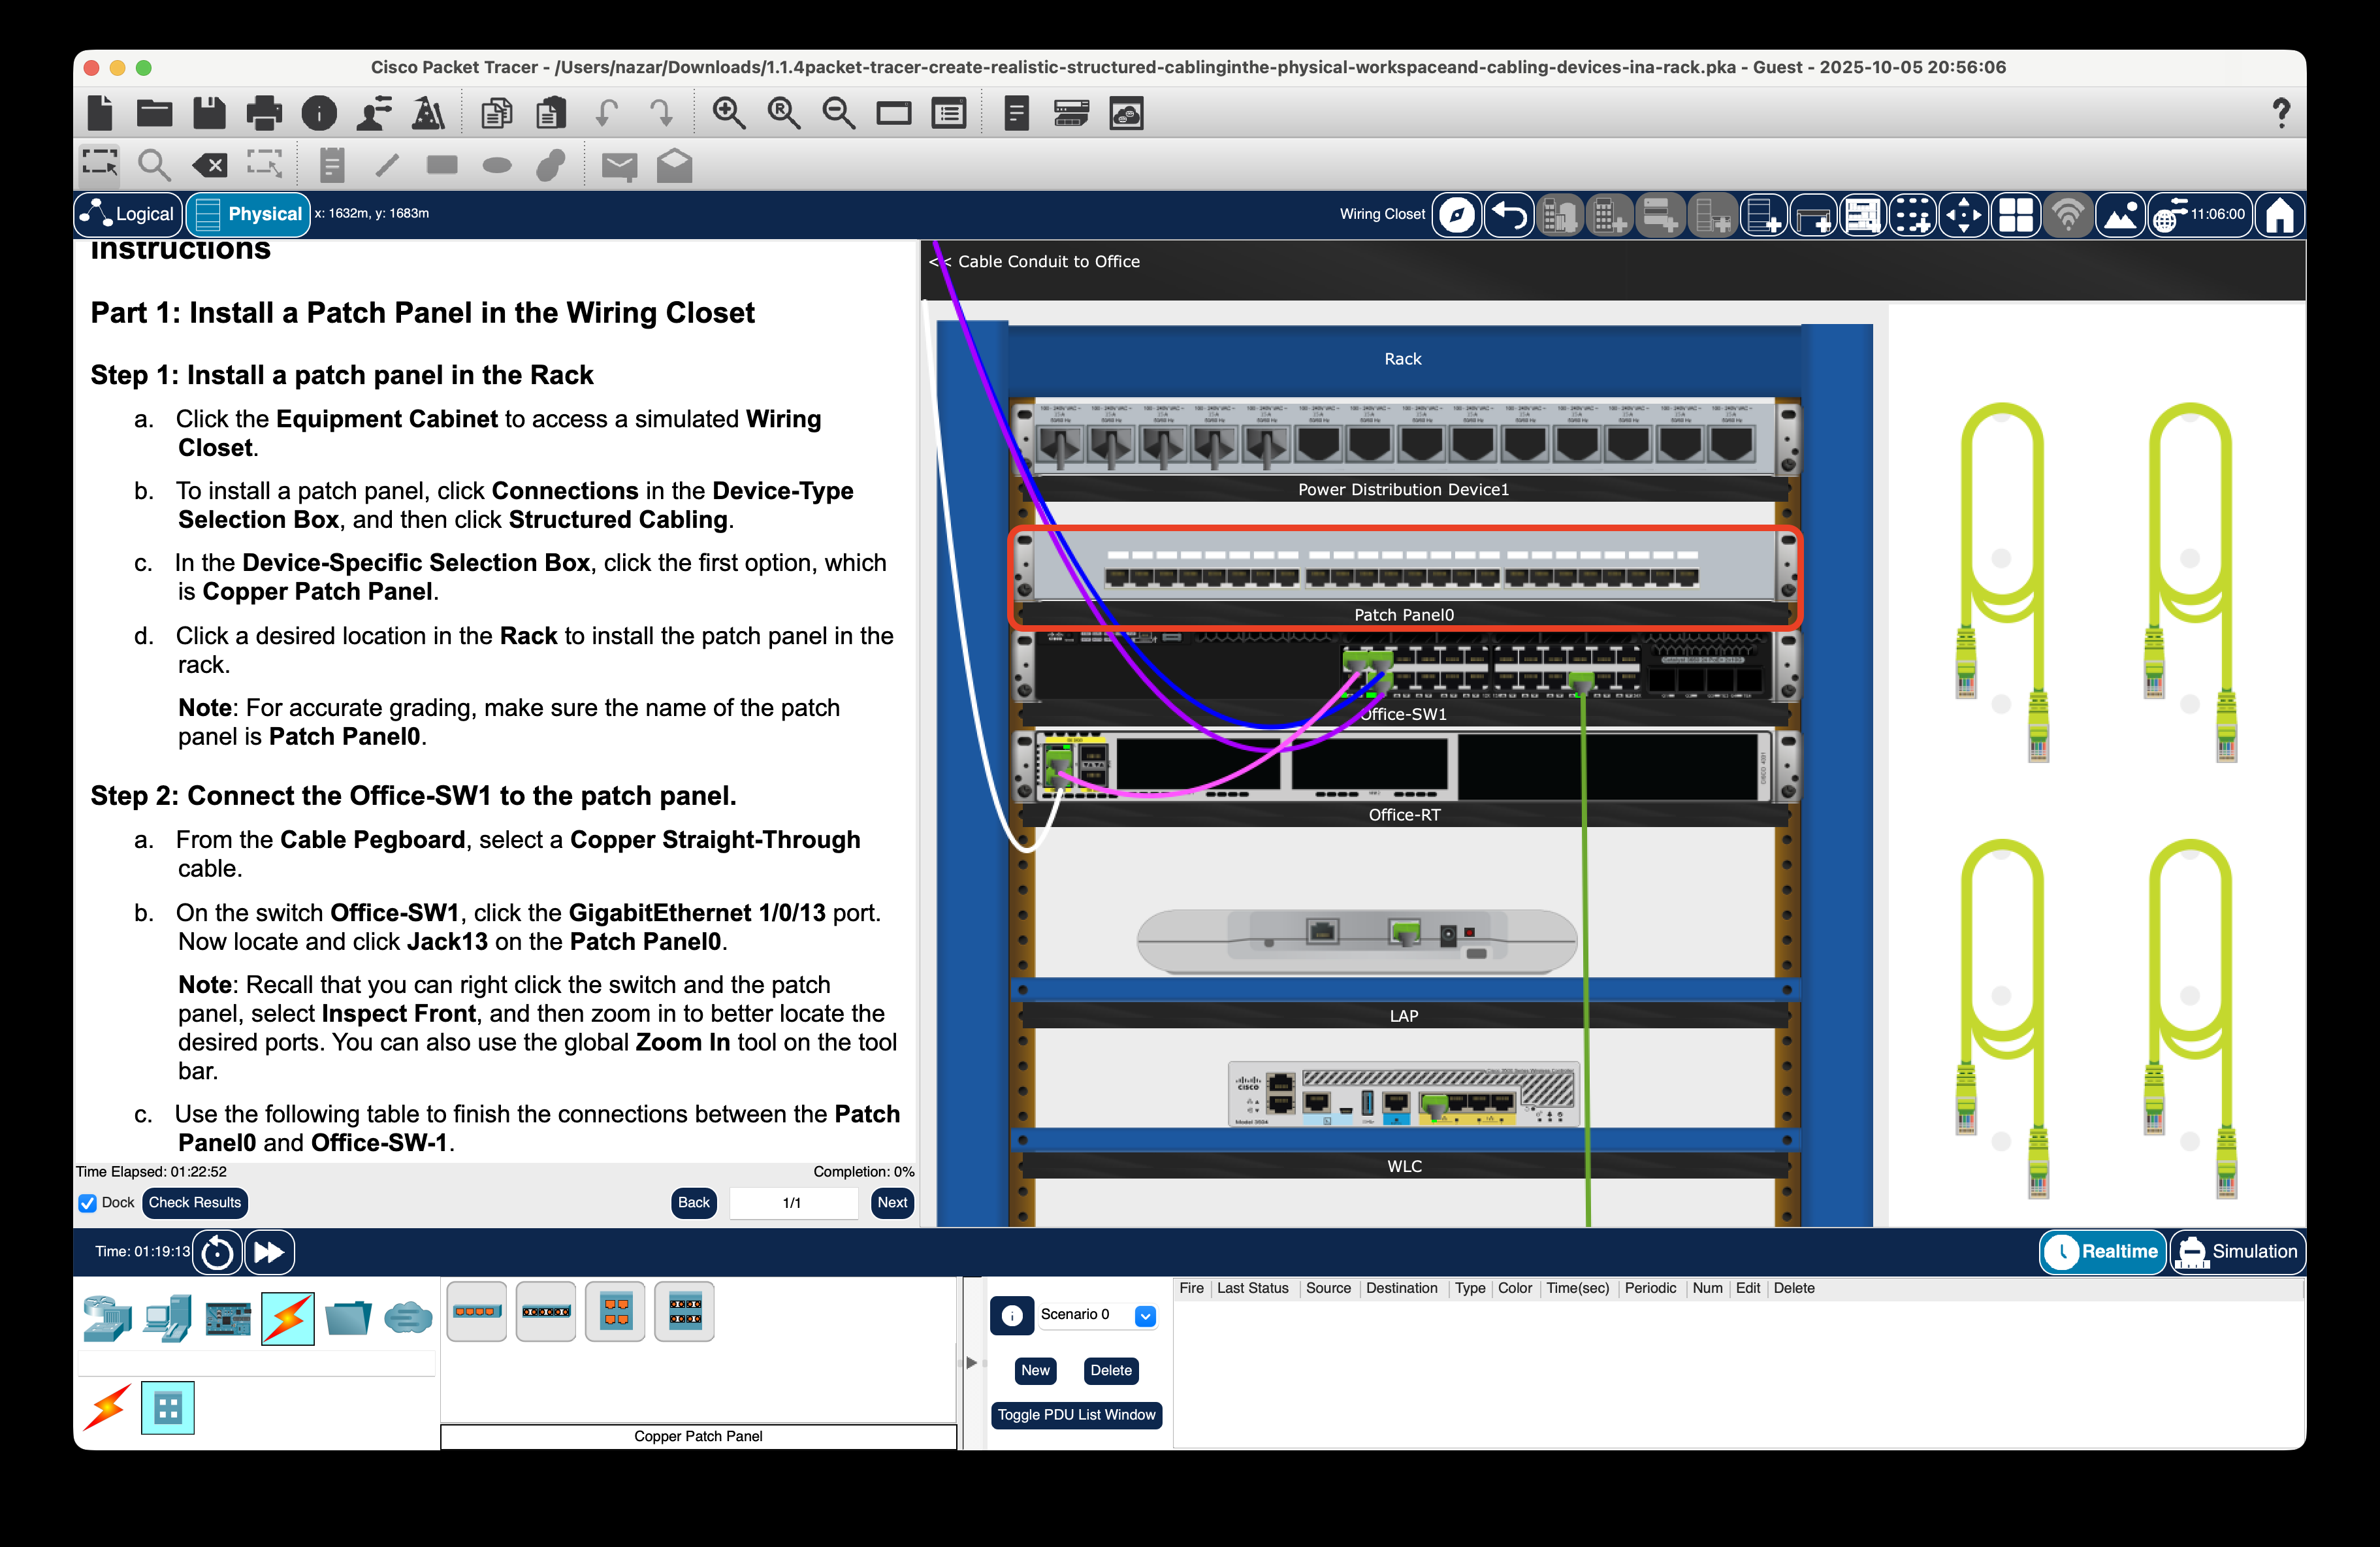
-
Step 2: Connect the Office-SW1 to the patch panel.


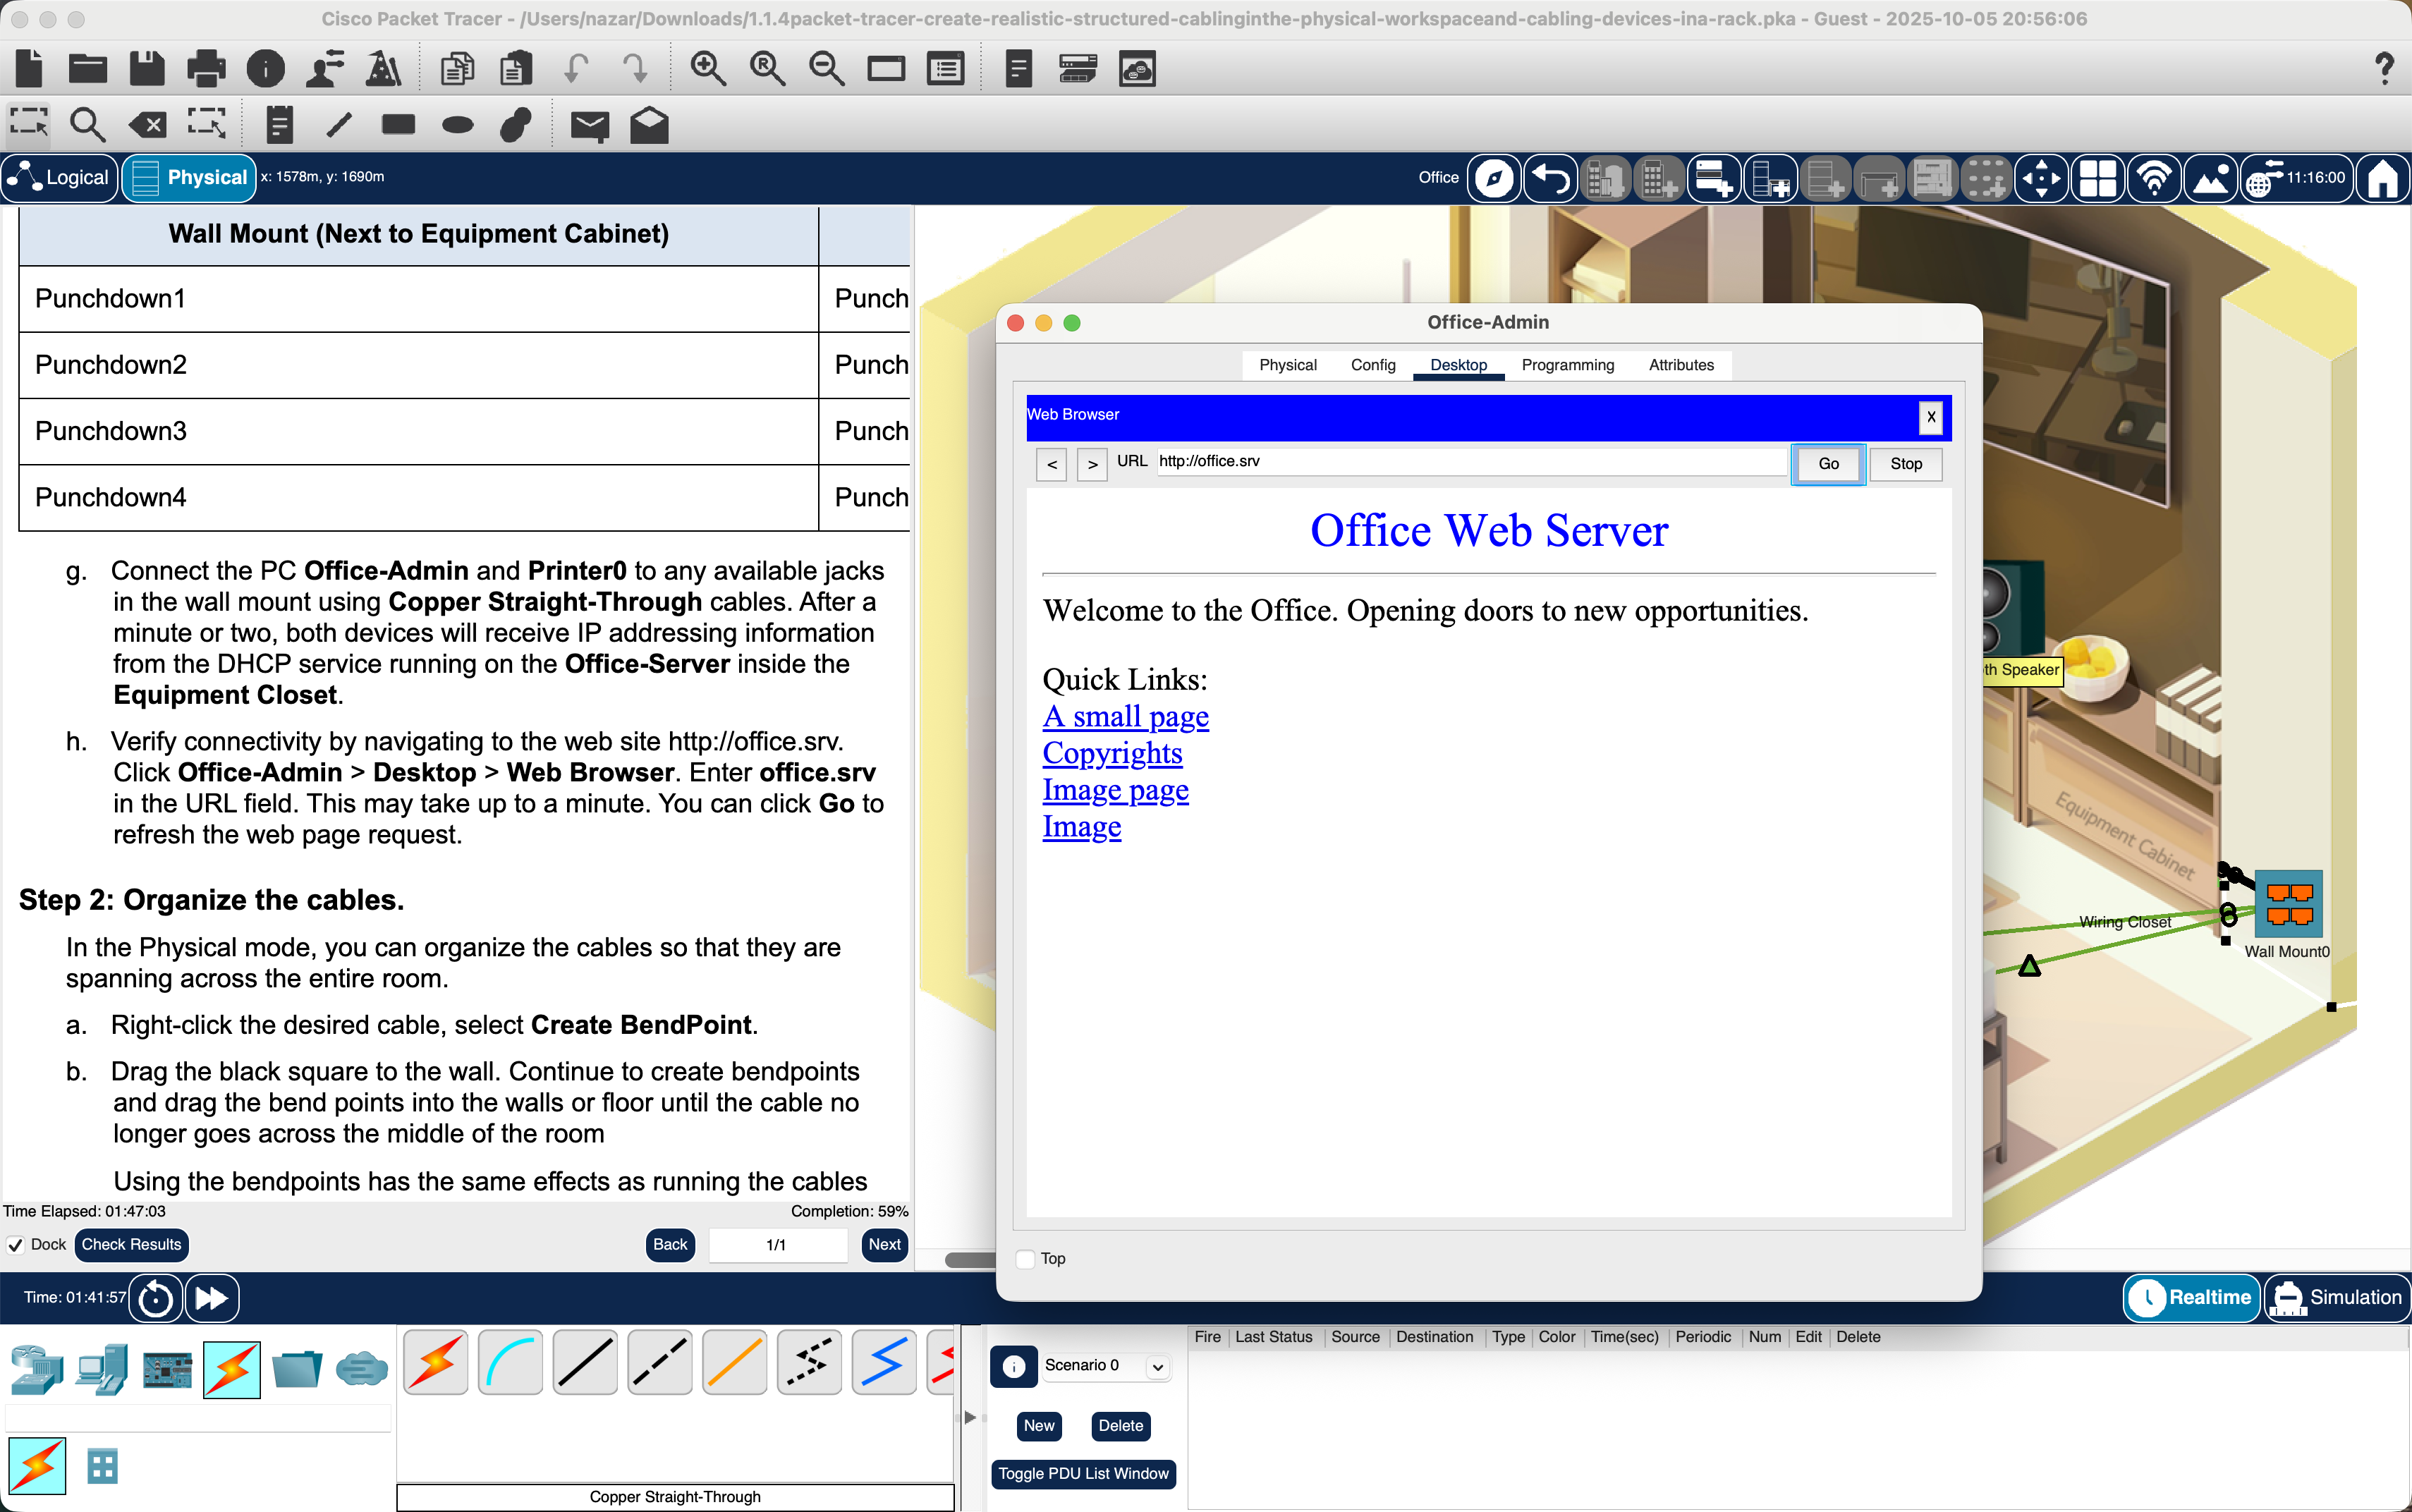
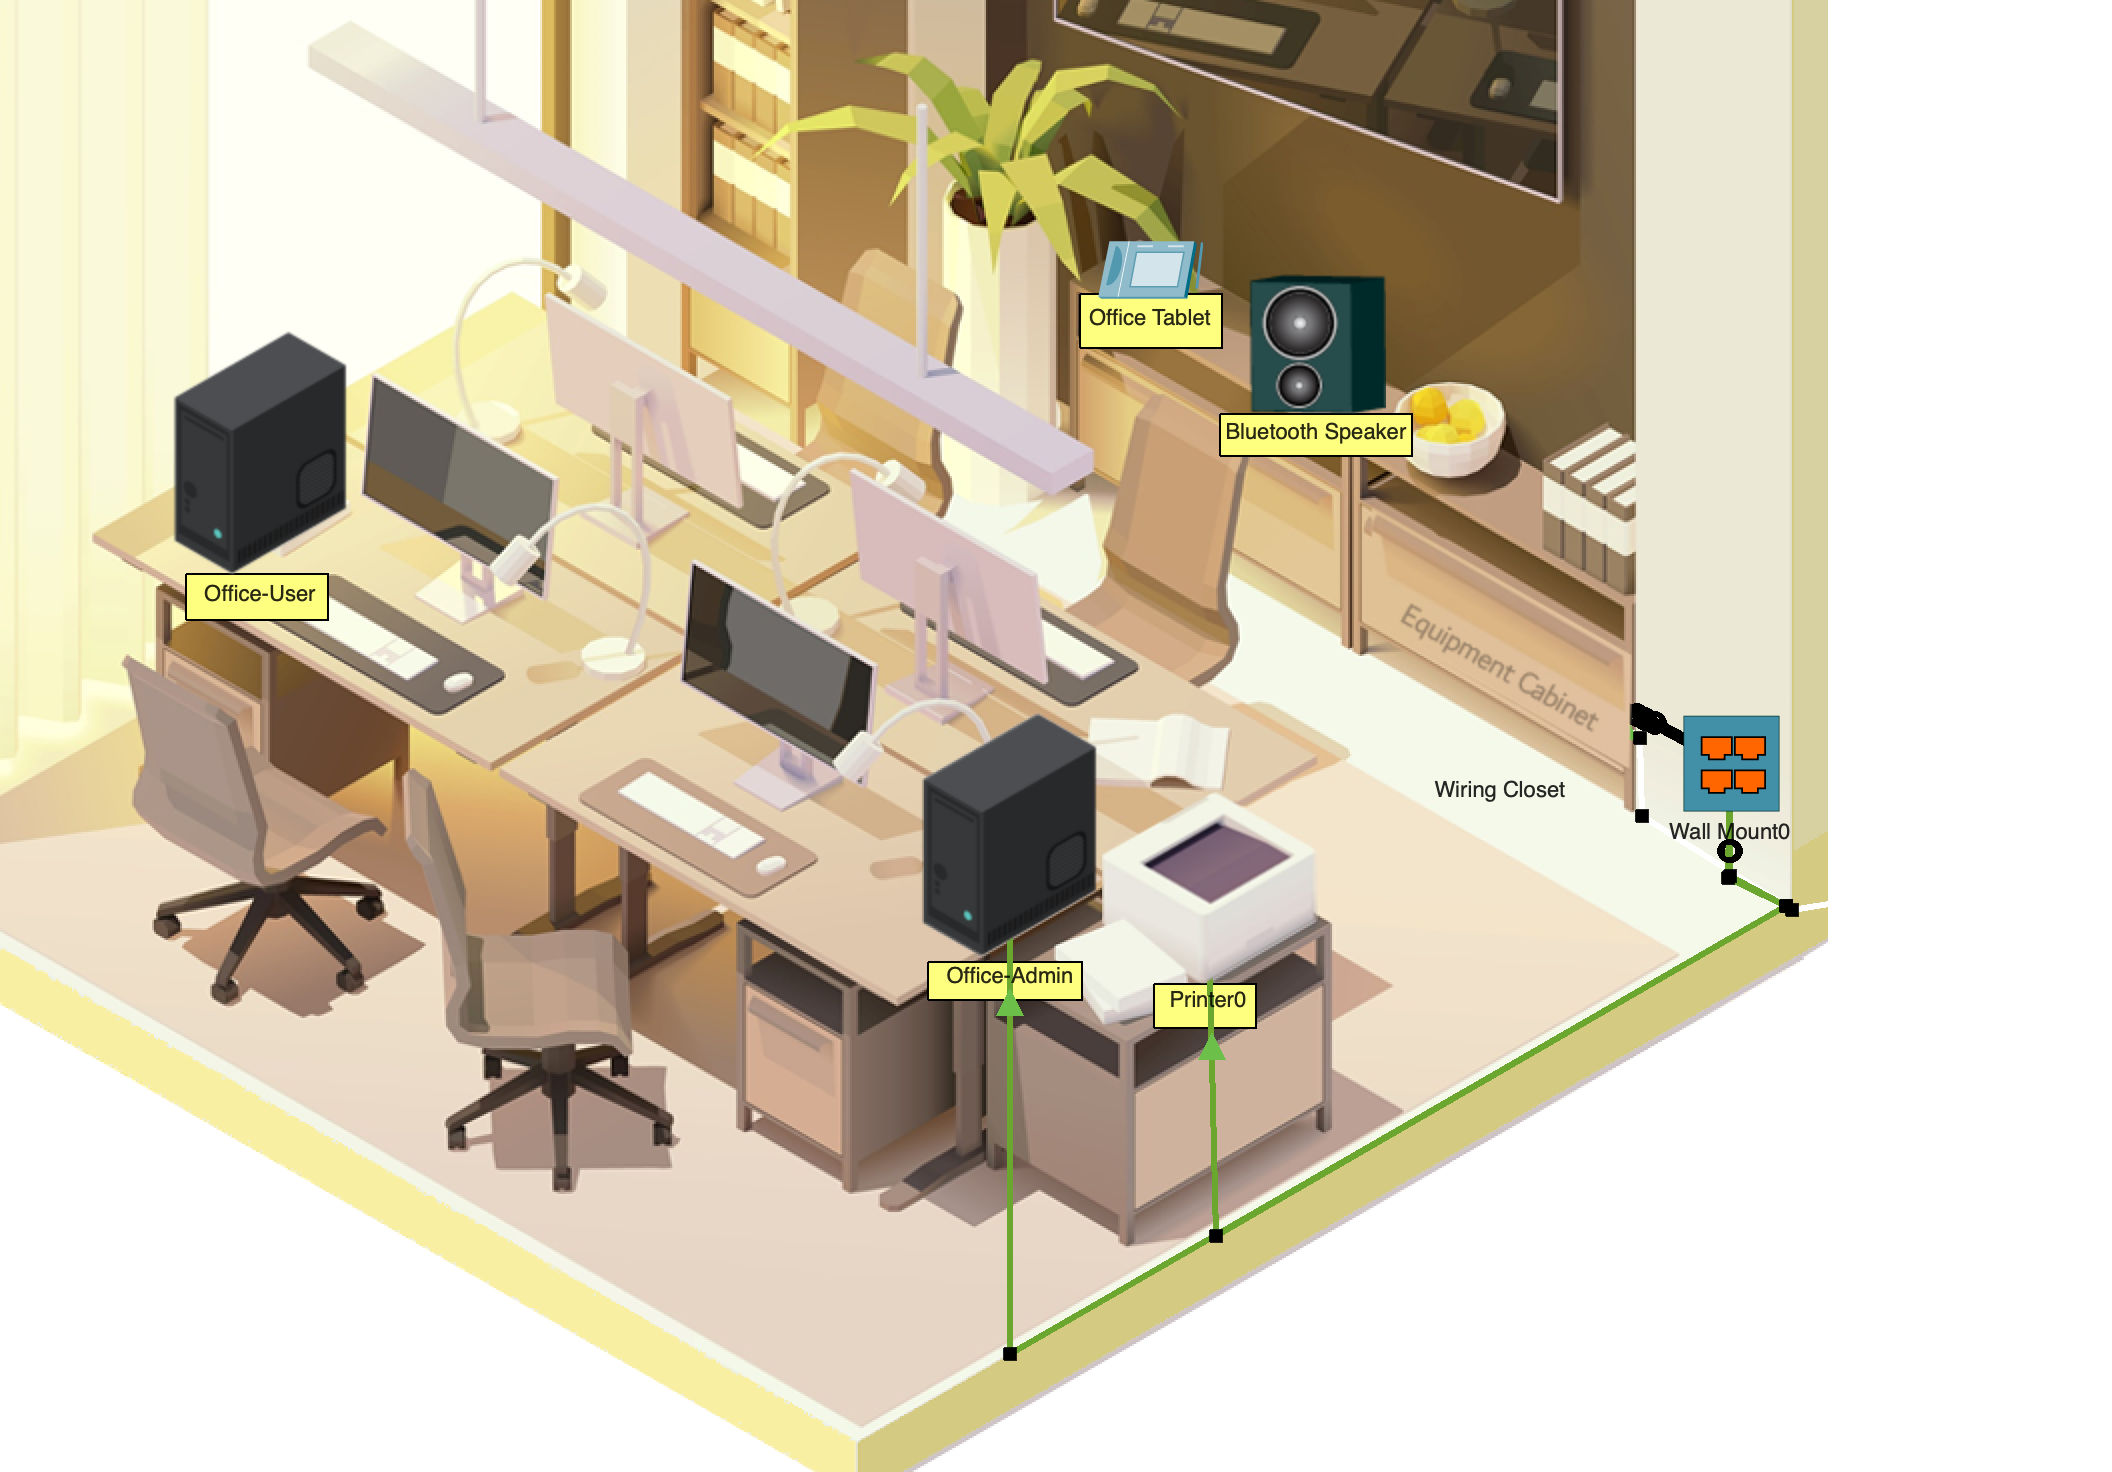
Part 2: Attach a Wall Mount in the Office
-
Step 1: Install a wall mount;

-
Step 2: Organize the cables.


Part 3: Connect an Additional Wall Mount and Cables


